Getting Started
Hardware Installation
If you intend to power the HALPI computer via the NMEA 2000 network, the device is ready to use as-is! Connect the HALPI computer to the NMEA 2000 network using a Micro-C drop cable and a T-connector. To minimize voltage drop over the network backbone, it is recommended to place the HALPI computer close to the power feed.
If you intend to power HALPI using a dedicated power connector, you need to open the enclosure and replace the green NMEA 2000 power connector with the dedicated power connector. See the photo below. In this case, you need to solder a power cable to the provided SP13 cable plug. The maximum wire size for the connector is 2 mm² or 14 AWG.
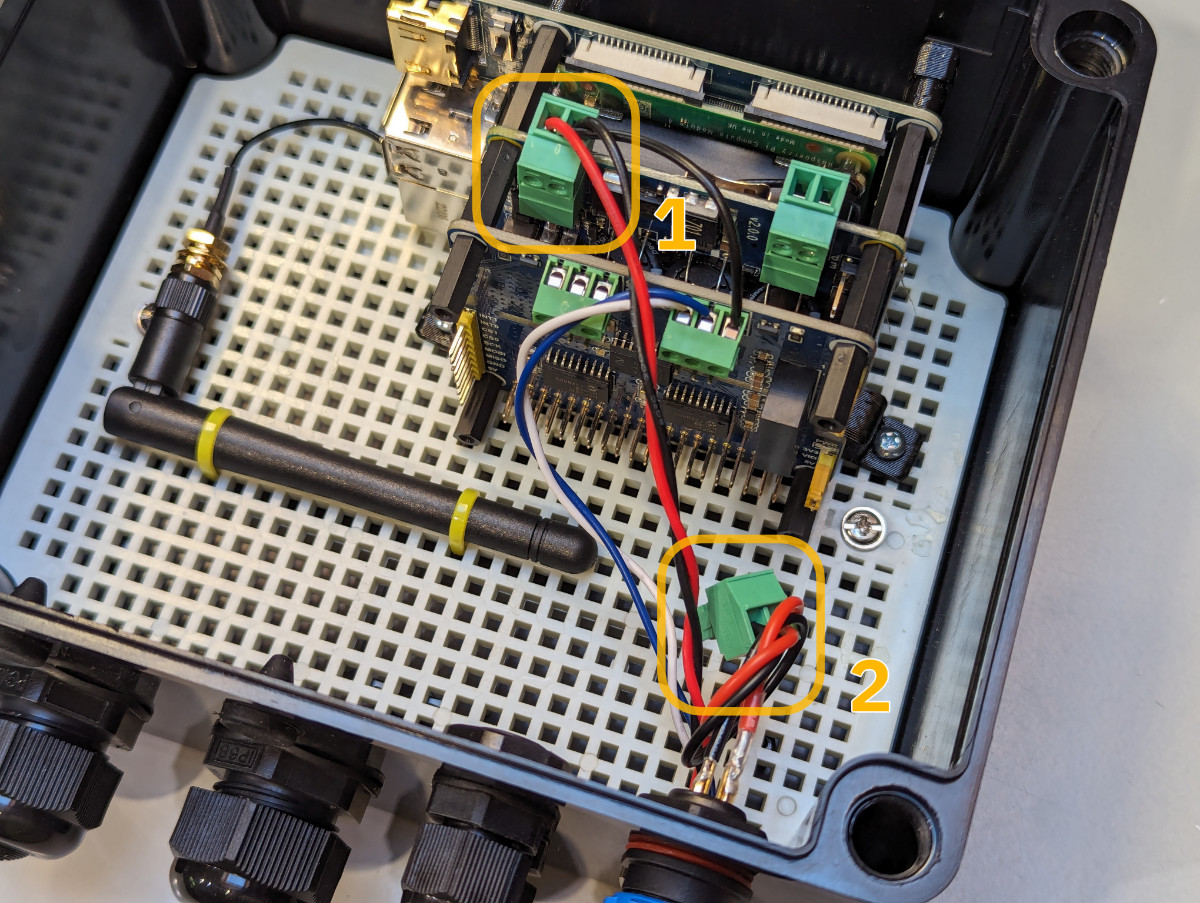
To power HALPI using a dedicated power connector, replace the green plug #1 with the plug #2.
Despite being waterproof, the enclosure should be protected from the elements. HALPI computers can be mounted in any orientation. If mounted on a wall, the enclosure should be mounted with the cable glands facing downwards or to the side to minimize the possibility of water ingress. Velcro tape is an excellent option for wall-mounting since it is relatively secure and allows for easy removal of the computer. The HALPI-M enclosure also allows for screw mounting using the 4 mm screw holes under the plastic lid screws. If a HALPI-S is to be screw-mounted, mounting tabs need to be devised and attached to the enclosure.
Initial Configuration
HALPI comes pre-installed with OpenPlotter 4 Headless edition. It can be used either with or without a display, keyboard, and mouse.
If you have display connected, follow the OpenPlotter 4 documentation to configure the system.
On a headless system, you will first need to connect to the WiFi Access Point created by the HALPI computer. Then, you can access the HALPI computer using VNC (or SSH) and carry on with the initial setup following the OpenPlotter 4 documentation. To use VNC, download VNC Viewer. VNC provides a remote desktop interface to access the HALPI desktop interface.
Important steps are to change the default password, the WiFi Access Point password, and to configure WiFi client settings if needed.
Configuring Signal K
Signal K is a modern and open-source universal marine data exchange format and server that can be used to connect various navigation software and hardware.
OpenPlotter 4 comes pre-installed with Signal K.
Basic interfaces such as NMEA 2000 and GPS, if any, are pre-configured, but you may need to adjust the settings to match your specific setup.
Access the Signal K web interface by navigating to http://openplotter.local:3000 in your web browser.
You can do that using your computer web browser or even a smartphone or tablet – it doesn’t have to be over the VNC Viewer.
Instructions for configuring Signal K can be found in the Signal K documentation.